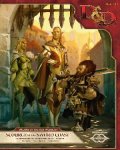
Mistwell
Crusty Old Meatwad
I ran a part of this adventure last night (the Duerger area) and I ran into a problem that others had already noticed but I had forgotten about.
The map. It's in 10' squares, not 5' squares.
So I reproduced it as pictured, with 5' squares, in Roll20.
Yeah, that wasn't pretty. My players were saying, "Damn, it's cramped in here, kinda hard to fight". As first I just shrugged and figured dwarves like tight quarters (it was a previously dwarven area).
But then when the big battle came, where most of the Duerger were laying in wait for the party to arrive (four barracks worth of them, all in an inter-connected area), that's when the real trouble happened.
I couldn't attack the players effectively with the Duerger. The damn things couldn't fit in the corridors, and due to turns in the corridors many couldn't even get line of sight on the PCs to use a ranged weapon. It just ended up looking like a snake of a line of Duergers all lined up to be slaughtered almost one at a time.
Not pretty. That's when I looked at the map again, saw the 10' notation, and did a forehead slap.
I was able to quickly expand some of the corridors (the parts the players hadn't seen yet) and had the Duerger retreat to those areas, so it all managed to work out OK. But damn, that was a blunder.

I also wish there were more notes on recommended tactics. For example, there is a trap where Duerger can set off streams of fire at the PCs, but no recommendation as to when they would set this off. Several other areas where the Duerger have arrow loops looking into areas where the PCs are likely to go, but no description of what the Duerger are likely to do at this point when they do spot the PCs that way. I am not looking for much here, just a single sentence on those highly likely scenarios.
The map. It's in 10' squares, not 5' squares.
So I reproduced it as pictured, with 5' squares, in Roll20.
Yeah, that wasn't pretty. My players were saying, "Damn, it's cramped in here, kinda hard to fight". As first I just shrugged and figured dwarves like tight quarters (it was a previously dwarven area).
But then when the big battle came, where most of the Duerger were laying in wait for the party to arrive (four barracks worth of them, all in an inter-connected area), that's when the real trouble happened.
I couldn't attack the players effectively with the Duerger. The damn things couldn't fit in the corridors, and due to turns in the corridors many couldn't even get line of sight on the PCs to use a ranged weapon. It just ended up looking like a snake of a line of Duergers all lined up to be slaughtered almost one at a time.
Not pretty. That's when I looked at the map again, saw the 10' notation, and did a forehead slap.
I was able to quickly expand some of the corridors (the parts the players hadn't seen yet) and had the Duerger retreat to those areas, so it all managed to work out OK. But damn, that was a blunder.

I also wish there were more notes on recommended tactics. For example, there is a trap where Duerger can set off streams of fire at the PCs, but no recommendation as to when they would set this off. Several other areas where the Duerger have arrow loops looking into areas where the PCs are likely to go, but no description of what the Duerger are likely to do at this point when they do spot the PCs that way. I am not looking for much here, just a single sentence on those highly likely scenarios.
Last edited:


