Kris
Adventurer
Hello All!
I've seen a few examples on the internet from people who have used the 'dipping' technique to get a bunch of their miniatures painted very quickly. However, being someone who likes to paint miniatures, I wasn't too fond of the idea - but in all honesty, I've got so many unpainted figures lying around, that well... I thought I could at least give it a try (and share my thoughts on my first 'dipped' miniature attempt).
For those of you unfamiliar with the technique... it basically involves priming your miniatures, and then giving them a quick base-coat of flat colours (no highlights or shading) - and then simply dunking them into a tin of varnish/stain. Sounds pretty crude right?
Anyway... I decided to give it a go, and so I assembled a GW plastic orc (I'm not all that fond of the GW orcs - so I was not too worried about ruining it") ), gave it a coat of primer and glued it to it's base (well actually, I had originally glued it to a square base prior to priming - but then decided to replace it with a 2p coin instead ).
), gave it a coat of primer and glued it to it's base (well actually, I had originally glued it to a square base prior to priming - but then decided to replace it with a 2p coin instead ).
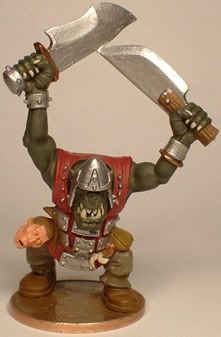
Then all I did was give it a quick base-coat of the basic colours I had chosen... not being too particular - just getting the paint onto the miniature at this stage. It took me about one hour (as I am a very slow painter - most people could probably have done it in half the time).
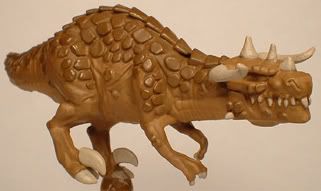
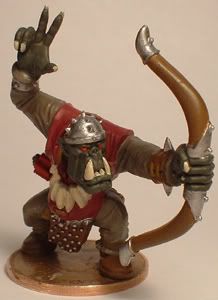
Anyway here's what it looked like at the pre-dip stage:
Next it was time for the dip.
The stuff I used was from my local Wilkinson's (Wilko's) Store, and is their own brand 'Interior & Exterior Woodstain'. I chose the 'satin walnut' colour (it cost £2.79 GBP for a 250ml tin I think).
So, once the miniature was dry I simply dipped the whole thing, head first, into the tin of woodstain for a few seconds... took it out... and shook off the excess for around a minute or so (in a nearby cardboard box).
At this stage there were a few areas where the stain had gathered heavily in some of the recesses (that I was having trouble shaking out) and after being placed back onto the table it slowly started to form a large drip at the bottom of his loincloth. To ease this problem I simply took a paper tissue, and gently poked the corner of it into these areas - and let it soak up some of the excess. All in all this whole process probably took less than 10 mins.
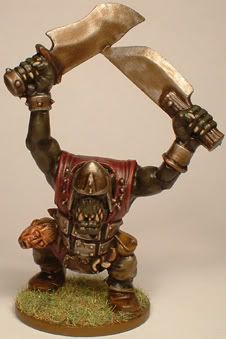
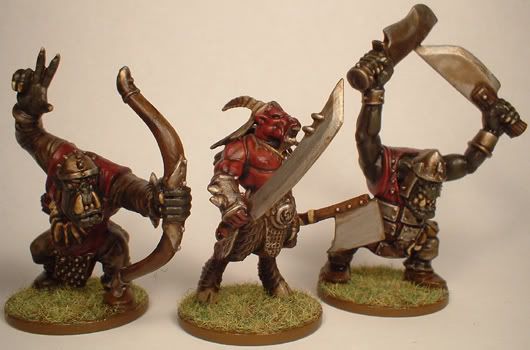
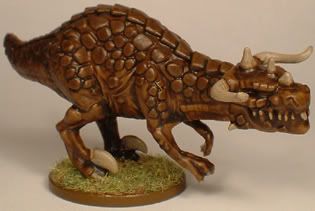
Then I left it to dry for a couple of hours (it say's 'quick drying' on the tin") ) - after which all it needed was the base painting brown and a little static grass added. This is the final result:
) - after which all it needed was the base painting brown and a little static grass added. This is the final result:
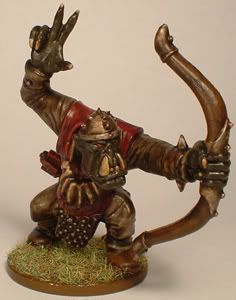
Admittedly it's not great, but it looks like this technique may be worthwhile if you are in a hurry to get a few figures painted up in time for your next game session, or if you simply have a lot of grunts to paint and would rather not spend that much time painting them.
So there you have it... I thought I would post my experience (and results) just in case it was of interest to anyone out there who was considering the technique, or who had perhaps not heard of it before.
If anyone else has done this before, or has a few tips and tricks, it would be cool to hear about them
I've seen a few examples on the internet from people who have used the 'dipping' technique to get a bunch of their miniatures painted very quickly. However, being someone who likes to paint miniatures, I wasn't too fond of the idea - but in all honesty, I've got so many unpainted figures lying around, that well... I thought I could at least give it a try (and share my thoughts on my first 'dipped' miniature attempt).
For those of you unfamiliar with the technique... it basically involves priming your miniatures, and then giving them a quick base-coat of flat colours (no highlights or shading) - and then simply dunking them into a tin of varnish/stain. Sounds pretty crude right?
Anyway... I decided to give it a go, and so I assembled a GW plastic orc (I'm not all that fond of the GW orcs - so I was not too worried about ruining it
), gave it a coat of primer and glued it to it's base (well actually, I had originally glued it to a square base prior to priming - but then decided to replace it with a 2p coin instead ).Then all I did was give it a quick base-coat of the basic colours I had chosen... not being too particular - just getting the paint onto the miniature at this stage. It took me about one hour (as I am a very slow painter - most people could probably have done it in half the time).
Anyway here's what it looked like at the pre-dip stage:
Next it was time for the dip.
The stuff I used was from my local Wilkinson's (Wilko's) Store, and is their own brand 'Interior & Exterior Woodstain'. I chose the 'satin walnut' colour (it cost £2.79 GBP for a 250ml tin I think).
So, once the miniature was dry I simply dipped the whole thing, head first, into the tin of woodstain for a few seconds... took it out... and shook off the excess for around a minute or so (in a nearby cardboard box).
At this stage there were a few areas where the stain had gathered heavily in some of the recesses (that I was having trouble shaking out) and after being placed back onto the table it slowly started to form a large drip at the bottom of his loincloth. To ease this problem I simply took a paper tissue, and gently poked the corner of it into these areas - and let it soak up some of the excess. All in all this whole process probably took less than 10 mins.
Then I left it to dry for a couple of hours (it say's 'quick drying' on the tin
) - after which all it needed was the base painting brown and a little static grass added. This is the final result:
Admittedly it's not great, but it looks like this technique may be worthwhile if you are in a hurry to get a few figures painted up in time for your next game session, or if you simply have a lot of grunts to paint and would rather not spend that much time painting them.
So there you have it... I thought I would post my experience (and results) just in case it was of interest to anyone out there who was considering the technique, or who had perhaps not heard of it before.
If anyone else has done this before, or has a few tips and tricks, it would be cool to hear about them